
NOTE: To see all the buttons for batch mode, you may need to view the window at full screen. Also note you can move the bar between the graphic picture and the table to give more room to the table.
NOTE: All files used in this tutorial are available in batchFiles.zip.
JFLAP now has the ability to run multiple strings against multiple files at once. Before using this mode, you might want to prepare in advance a text file. This file cfa3.jffontains different things depending on the type of file that is being tested. Below is the format for finite automata which is simpler than that for Turing Machines which is explained later. The file consists of strings that you want the machines tested on followed by whether a correct file will accept or reject that string.
inputString1 accept/reject
inputString2 accept/reject
inputString3 accept/reject
and so on.
Here's an example text file.
If accept or reject is not explicitly stated JFLAP assumes that the string is supposed to be accepted. Case does not matter so Accept, accept, aCCEpt, etc are all treated the same.
Creating a text file is not required as input strings can be added within JFLAP once in the batch run mode.
To enter batch run mode choose the batch mode from the main menu.

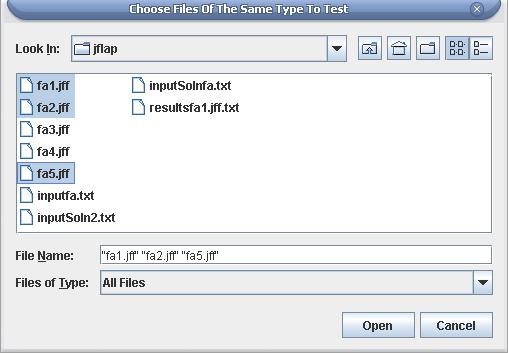
It will ask you to choose files of the same type, so don't mix grammars and Turing Machines. You can use ctrl to select multiple files individually, or hold shift and click on two files to select all files in between, just as in a windows file explorer. When you have your files press enter.
A new file open dialogue appears for you to select a text file. If you have prepared a text file select it now, otherwise press cancel.

If you have a text file, it will automatically enter Multiple Run mode, with the file name on the left, and the input columns filled in.

To look at one of the other files, simply click on a row with the corresponding file name. See how below selecting one of the rows labeled fa2.jff made the view switch to that file.

To run the files and strings press Run Inputs. Whenever the result of the machine differs from the expected result it will be displayed as "machinesResult(expected result)" as seen below.

The View Trace button lets you see each step the selected automaton took when stepping through the selected input string. In the picture below View Trace has been pressed with the row fa2.jff and input string selected as shown above.

Edit File allows you to edit the selected file.

You can change the file as much as you want. Here we will just rearrange the states.

To exit the edit file mode press File - Dismiss Tab. Changes made to the file will affect the version that is being tested in the multiple run mode but not the file on disk when exited this way. To change the file on disk you must choose File - Save As and overwrite the original file before dismissing the tab. Below we see the results of our edits in the multiple run mode. Note that the states appear as we rearranged them.

Add input string allows you add another string to test on the files.

Add File lets you add another file or files to test the strings against. You can select multiple files the same way you did when originally choosing files to test.

The new file appears at the bottom.

Remove File deletes the selected file. Say we didn't want to add fa3.jff, we select one of the rows that has fa3.jff in the File column and press Remove File.
Save Results lets you save the results of each file to a separate text file. Upon clicking, a box appears asking you to choose whether to save the results in the same folder or specify a new location. If you choose to save the results with the original file then each file you are testing will have a results file saved in the same folder. You should remember to click Run Inputs before Saving Results since the results file contains only what is shown in the table when Save Results is pressed.

If you want to specify a new location to save all the results files to, mark that circle and press accept. A box prompts you to navigate to the directory you want to results saved to.

Press save and you're done, files are saved in the form "results(original filename without parentheses).txt"
This feature works essentially the same as the Batch Run mode for Finite Automata. The format of the text file is the same.
This feature works essentially the same as Multi-Input Grammar with the added multi-file capabilities described in more detail in the Finite Automata example above. The format of the text file is the same.
For single-tape Turing Machines the format is almost the same as for Automata and Grammars but you now have the additional ability to define an expected output when running the machine as a transducer. The format of the text file is now:
inputString1 outputString1 accept/reject
inputString2 outputString2 accept/reject
If you have a multiple tape Turing Machine use the following format:
inputString1Tape1 inputString1Tape2 outputString1Tape1 outputString1Tape2 accept/reject
inputString2Tape1 inputString2Tape2 outputString2Tape1 outputString2Tape2 accept/reject
For any output strings that you don't care if the student's machine matches type ~.
Here's an example text file.

In the first line it says that when the string AABBCCDD is run the expected output is XXBBCCDD and the turing machine should accept.
In the second line it says that when the string ABCD is run the output should be XBCD and it should accept.
In the third line it says that when the string ABCD is run the expected output is BCD and the Turing Machine is supposed to reject the string. However, JFLAP does not allow you to define the expected output when it is supposed to reject. This means that when the Run Inputs button is pressed JFLAP will accept any output as correct as long as it rejects the input string. The correct format for this third line is:
ABCD ~ reject
JFLAP will correct this error internally so typing "ABCD BCD reject" and "ABCD ~ reject" in the input file are equivalent.
The fourth line says that for the string BAACD it doesn't matter what the output is as long as the machine accepts.
If accept or reject is not explicitly stated JFLAP assumes that the string is supposed to be accepted.
Below you will see the output from a batch run on the example test file.

Many of the features utilized for finite automata work for single-tape Turing machines. To look at another file, simply click on a row with the corresponding file name. View Trace and Edit File act as described above in the fa example depending on the file being shown. If you choose Edit File and make changes to the file the changes will be reflected next time you run the inputs. Save Results allows you to output the results of the testing to separate text files. Here is one of the files that results from the example above.

As you can see it is in the same format as the table, with expected results in parentheses. This makes it easy to see where errors were made and what the errors were.